It’s probably not surprising to learn that Facebook has become the most widely-used social media outlet in the world, boasting over 2 billion active users as of late 2017(1). The social networking giant is unique in that it caters not only to the younger Gen-X & Millennial demographics, but also to those born before: 79% of online adults ages 30 to 49 in the U.S. use Facebook, and about 56% of online Seniors age 65 and up use the site as well(2).
Facebook is a regular part of the daily lives of 53% of Americans(3), but what happens when we pass away and leave our profile behind, locked with password that is most likely a total mystery to others? Previously, when Facebook learned of a death, it would “memorialize” the account, which left it viewable, but unable to be managed by anyone. However, Facebook has recently introduced a “Legacy Contact” feature that allows users to designate a Facebook friend to manage their account after they pass away.
Upon telling Facebook that someone has died (by submitting a memorialization request), Facebook will memorialize the account and the pre-chosen Legacy Contact will be able to write a post to pin at the top of the Timeline, respond to new friend requests, and update the profile picture and cover photo. However, the legacy contact will not be able to see the private messages of the original user.
If you’re into planning ahead, here’s a step-by-step guide to designating a Legacy Contact for your Facebook:
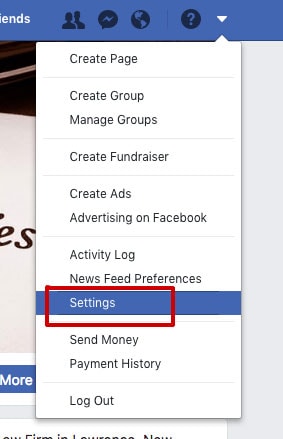
1, Once logged in, select the triangle in the upper right-hand corner of the screen. On the drop-down menu that appears, click Settings.
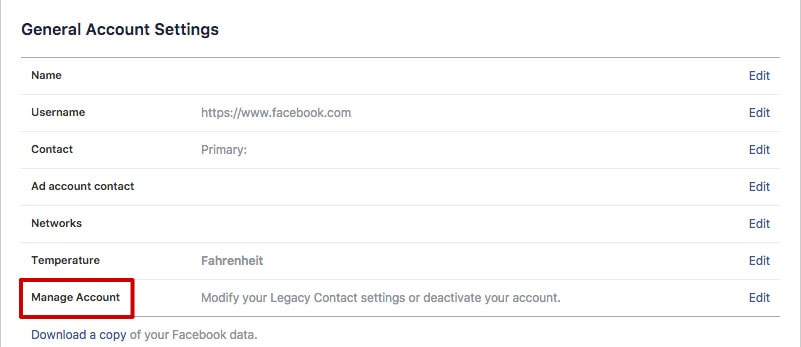
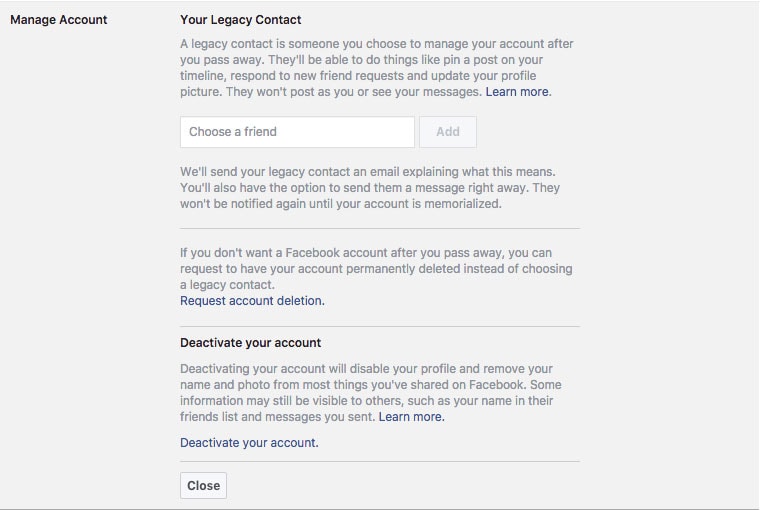
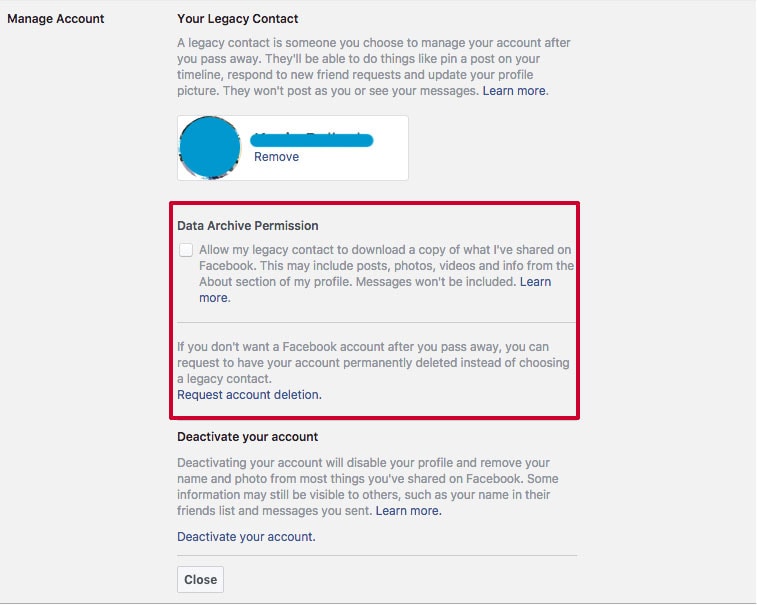
2, On the General Account Settings page, at the bottom of the list of options, click on Manage Account. This will expand the box, and you’ll be able to type in the name of the Facebook friend who you’d like to be your Legacy Contact. Click on their name when they pop up. Please note that you can only select someone who is your friend on Facebook.
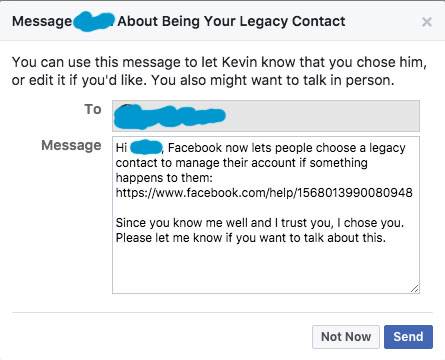
3, A small window will appear with the option to send a message to your Legacy Contact letting them know that you’ve selected them. You can choose to edit and Send the message, or hit Not Now if you want to talk with them about it later.
4, Once you’ve selected your contact, you may choose to check (or not check) the Data Archive Permission box, which will allow your Legacy Contact to download a copy of things you’ve shared on Facebook, including photos, videos, and other public info. Your contact will NOT be able to access your private messages.
You may also choose to simply have your account deleted after your death by selecting Request account deletion.
Selecting a Legacy Contact via Facebook is a very simple process and worth considering if you would like to be able to have your photos, words, and memories immortalized….or at least, downloaded and saved by those you love for years to come.
Special thanks to Chelsea Robinson for researching and writing the vast majority of this article.


